How to create, build, test and utilize a library of React components using Babel
In this article we will be creating a React component library
using Babel; a library is different from an application. Our library will containing reusable components that can be installed into other React applications from either the npm registry or directly from git. For developers that are not allowed to publish their code to the npm registry, such as myself, we will review how to install the library directly from git.
This is the
first article in a 2 part series:
In this article, we will simply use Babel to compile the React components into distributable JavaScript code that could be used as a library.
Setup package.json
Our starting point will be to setup our project to utilize npm by creating the package.json file at the root of your source code.
Create a new directory for your library
	mkdir cg-react-babel-lib
	cd cg-react-babel-lib
Create package.json
npm init
Install babel as your JavaScript compiler
npm install --save-dev @babel/core @babel/cli @babel/preset-env @babel/preset-react
Install React
npm install --save-dev react
Install rimraf (Used in build script for cleanup)
npm install --save-dev rimraf
Note: we installed our dependencies as a development dependency (—save-dev) so that they are not included in the build.
Create Library Components
Now that your project is setup to support npm we can create our components. You can follow along to build the project yourself, which is recommended, or you can download here:
https://CodeGorilla@bitbucket.org/CodeGorilla/cg-react-babel-lib.git
The project will have the following structure:
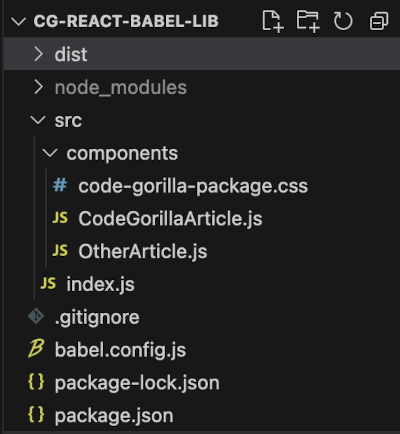
Create src/components folder
Create
code-gorilla-package.css in src/components folder
.code-gorilla-div {
  color: #ffffff;
  background-color: #007bff;
  font-family: Herculanum;
  font-size: 16px;
  border: 2px solid #adff2f;
  border-radius: 5px;
  padding: 10px;
  margin: 5px;
  text-align: center;
}
Create
CodeGorillaArticle.js in src/components folder.
import React from 'react';
import './code-gorilla-package.css';

const CodeGorillaArticle = () => {
    return (
        <div id="code-gorilla-article" class='code-gorilla-div'>
            <h1>Congratulations! </h1>
            <p>Your react component library is working!</p>
            <p>Go to <a href="https://www.code-gorilla.com/">Code-Gorilla.com</a> to read the full article!</p>
        </div>
    )
}

export default CodeGorillaArticle;
Create
OtherArticle.js in components folder. This is to demonstrate multiple components in your library.
import React from 'react';
import './code-gorilla-package.css';

const OtherArticle = () => {
    return (
        <div id="code-gorilla-article" class='code-gorilla-div'>
            <h1>Another Component!</h1>
            <p>Your react component library is working!</p>
            <p>Learn more about the Babel JavaScript compiler <a href="https://babeljs.io/">https://babeljs.io/</a></p>
        </div>
    )
}

export default OtherArticle;
Create
index.js in src folder. This will expose the src/components externally.
import CodeGorillaArticle from "./components/CodeGorillaArticle";
import OtherArticle from "./components/OtherArticle";

export { CodeGorillaArticle, OtherArticle };
Configure Babel
To configure Babel for the build, we will create a
babel.config.js file in the root folder of the project as follows:
module.exports = {
    presets: [
        "@babel/preset-env",
        "@babel/preset-react"
    ]
};
To learn more about configuration Bable:
https://babeljs.io/docs/usage#configuration
Build Distribution Code
Once all of the code is created we’ll want to compile it into JavaScript.
Build Script
To do this we will update the
package.json to support the build as follows:
"scripts": {

    "build": "npx rimraf dist && NODE_ENV=production babel src --out-dir dist --copy-files",

    "test": "echo \"Error: no test specified\" && exit 1"

  },
The test script placeholder should already exist from the npm init. We will be adding the build script. The results of the build will place the distribution code into a newly created “dist” folder.
rm -rf (rimraf) on Windows AND Mac
rimraf is a utility that provides the same capability as "rm -rf" on a unix command line. This provides the same syntax and capabilities on Windows, Mac and Unix/Linux and shouldn't require any additional installations.
Main Entry Point
Finally, you should update the “main” value in the package.json to provide the path to the distribution so that applications installing the code will know where the components are at.
"main": "dist/index.js",
Run Build
Build the distribution files, this will create the
dist folder and put the compiled JavaScript into it.
npm run build
Your library is now fully built and ready to use. Before we publish to the npm registry or git we can test locally, which is what we will be doing in the following steps.
Create Application
Now we will be creating a simple React application that will utilize our library.
Create a new directory for your library
	mkdir cg-react-babel-app
	cd cg-react-babel-app
Create the react application:
npx create-react-app cg-react-babel-app

cd cg-react-babel-app
Locally Install Library for Testing
Before we attempt to use the library from the npm repository or git, we can install the library locally as follows:
npm install path/to/cg-react-babel-lib
The path/to/cg-react-babel-lib value should be replaced with your directory location for the library created above.
Another alternative would be to create a link that can be accessed globally by going into the root of the library directory and executing the following:
npm link
Modify Application to use Library Components
In src folder, delete everything except:
Update App.js
Replace the contents of App.js with the following:
import { CodeGorillaArticle } from 'cg-react-babel-lib';

function App() {
  return (
    <div className="App">
     <p>Display the component:</p>
     <CodeGorillaArticle />
    </div>
  );
}

export default App;
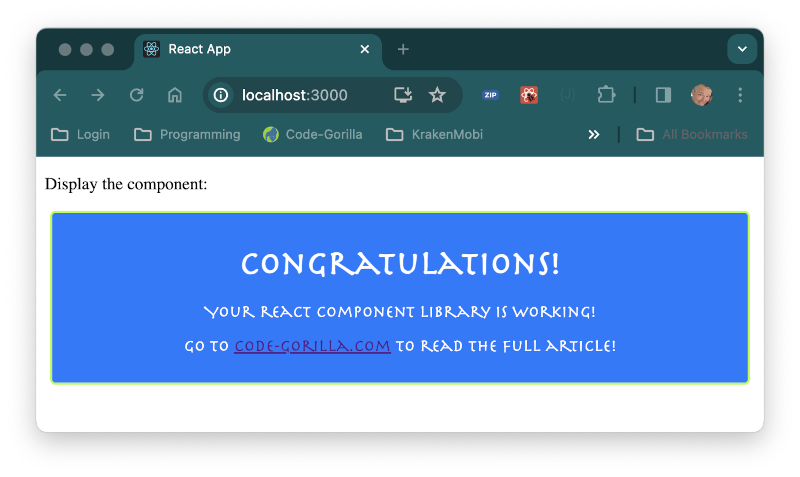
Run Application using Local Library
npm start
Once the application is running, it should launch and web browser to display the following:
Git Commit and/or Publish
At this point the library has been tested and ready to commit and/or publish.
You should now commit your code to your git repository.
If you have an npm account and have permission to publish your code you can do it now with:
npm publish
If you do not have permission, or if you simply don’t want to publish to the npm registry, you can still use the library directly from git, which is what we will be doing in the next step, where we will be building a React application to utilize our new library.
Install Library from Git
After confirming that everything is working locally we can now install from git.
First we should uninstall our local library:
npm uninstall cg-react-babel-lib
Now, we can finally install our library from git using the git+ prefix on your git repository. I have committed this code as a public git repository, so you could also install using my code using the following command:
npm install git+https://CodeGorilla@bitbucket.org/CodeGorilla/cg-react-babel-lib.git
Install from NPM registry
If you published your library to the npm registry you can simply install using the unique name that you published with. I have published the library from this article into the npm registry, which you could try as follows:
npm install cg-react-babel-lib
Conclusion
So if you’re writing multiple React applications and you find yourself copying and pasting the same code into each project, you can now place them into a library and simply install it into your new projects. And the added bonus is that as you’re improving your library by fixing patches and just making it more awesome, your applications are automatically being updated when they are rebuilt.
References