Write Your API Logic Once and Share It With Your Local Native Android and iOS User Interface using the KTor HTTP Client
In this article we will be building a KMM library that will create an HTTP Client that could be shared with iOS and Android in the form of an XCframework and Android Archive (AAR) respectively.
In a previous article, KMM: Use a Shared Binary Library in an iOS Project XCFramework Manually, I covered how you could create a simple library without any additional dependencies. In this article we will add KTor as a dependency, which is an HTTP client for both Android and iOS.
You can download the code for this article:
git clone https://CodeGorilla@bitbucket.org/CodeGorilla/cg-lib-kmm-http-client.git
All of the code we will be building in this article for both Android and iOS will be done within Android Studio. As of this article I am using the following:
- Android Studio Electric Eel
- Java 19
- Gradle 7.6
Create Kotlin Multiplatform Library
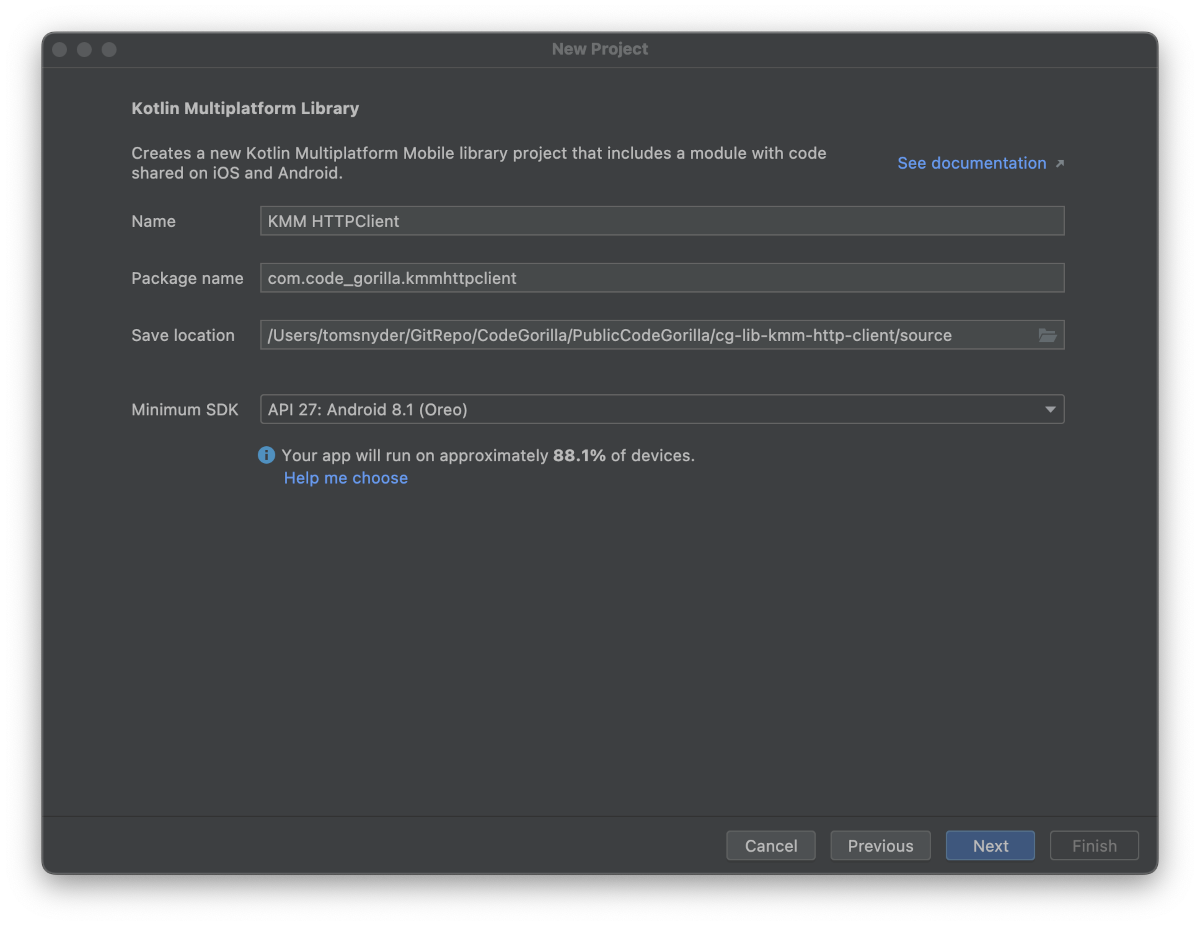
Open Android Development Studio and create a new project. Select the Kotlin Multiplatform Library option.

Enter the name of your library and select your save location and Android SDK.
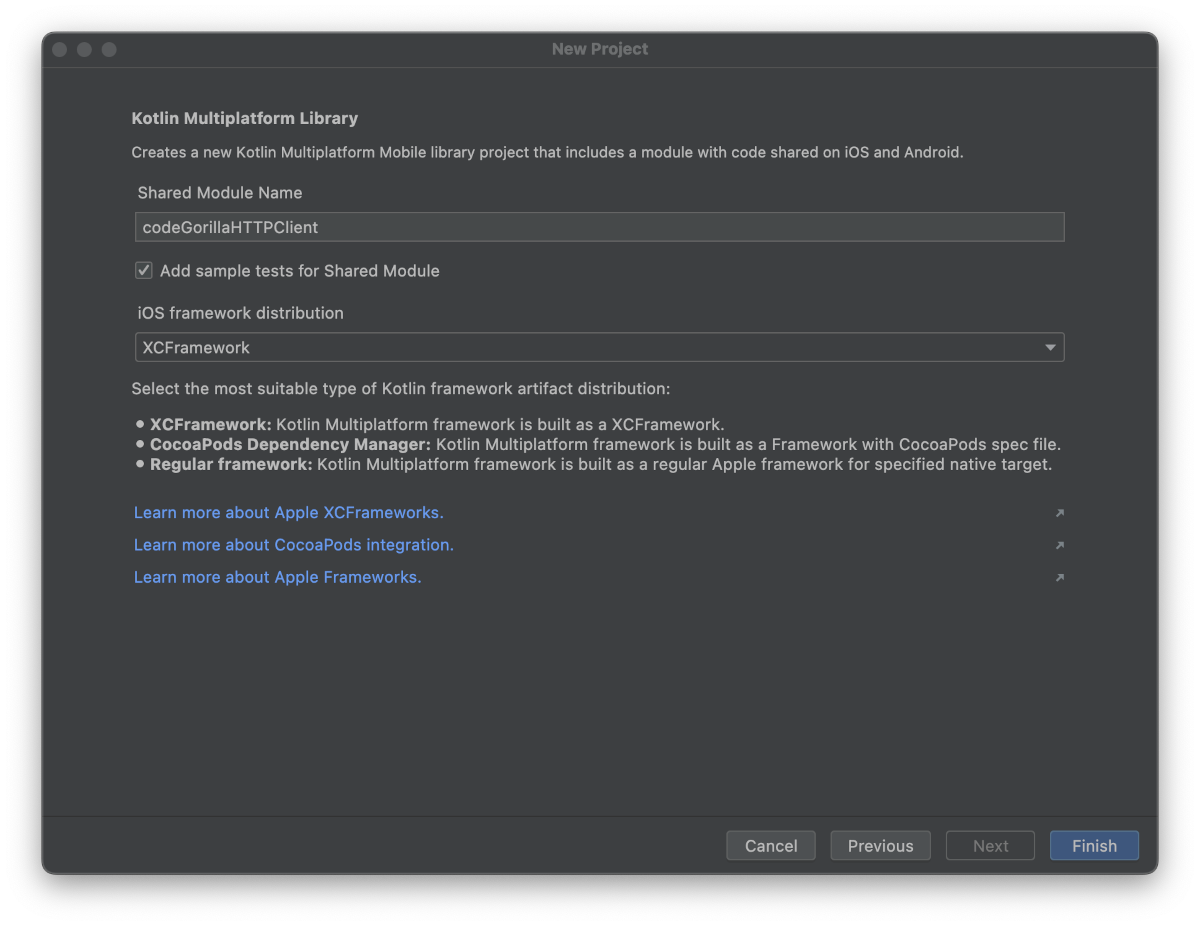
Enter the name of your shared module and select iOS framework distribution: XCFramework.
Troubleshooting
At this point you have a bare bones KMM library. If you have any errors in your build, please refer to my previous article KMM: Building a Simple Application for Android and iOS which fixes some gradle or JDK issues you may encounter.
Adding KTor Dependency
Once you have confirmed that the default template code runs successfully, we can now begin to update our dependencies to include KTor.
Update the build.gradle.kts file to add artifacts of KTor in several places within the sourceSets section.
First we will add a variable to hold the version of KTor we which to use. This will ensure all of the components are of the same version and makes it easier for future updates. We will then add the ktor-client-core dependency to commonMain.
sourceSets {

        val ktor_version = "2.2.4"

        val commonMain by getting {

            dependencies {

                implementation("io.ktor:ktor-client-core:$ktor_version")

            }

        }

}
The next dependency will be the engine that will be used for Android (ktor-client-okhttp) only. Update the existing androidMain to add the dependency.
val androidMain by getting {

            dependencies {

                implementation("io.ktor:ktor-client-okhttp:$ktor_version")

            }

        }
And finally, add the engine that will be used for iOS (ktor-client-ios) only.
val iosMain by creating {

            dependsOn(commonMain)

            iosX64Main.dependsOn(this)

            iosArm64Main.dependsOn(this)

            iosSimulatorArm64Main.dependsOn(this)

            dependencies {

                implementation("io.ktor:ktor-client-ios:$ktor_version")

            }

        }
After you have saved the build.gradle.kts, make sure to do a Gradle sync to get your updates.
Adding Functionality
For this example, we will be calling a simple HTTP GET RESTful web service which will respond with the user agent information of the client calling the service, with some additional versioning information. This is just for demonstration when building your demo.
The simple GET api we will be using in this example:https://www.code-gorilla.com/gorillaClientInfo should look similar to the following:
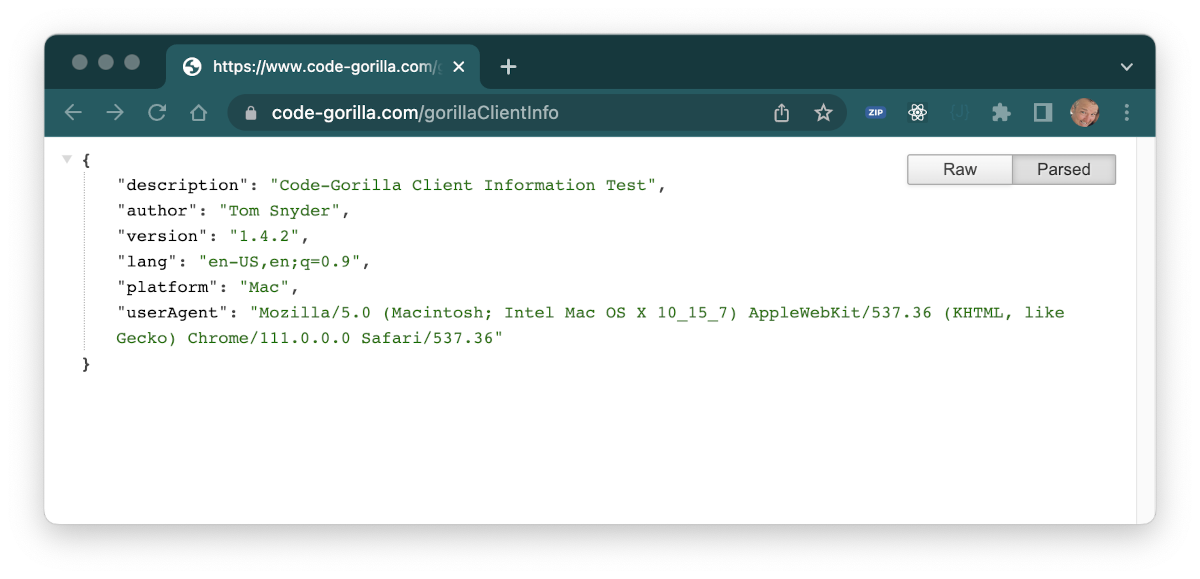
We are going to add a new GorillaHTTPClient class which will utilize the KTor as an HTTP Client. The GorillaHTTPClient class will simply call a RESTful web service and return the results as a string.
Right click on commonMain/kotlin/com.code_gorilla.kmmhttpclient and select New Kotlin Class/File. Add a new Class named GorillaHTTPClient.
Enter the following code into your new GorillaHTTPClient.kt file:
package com.code_gorilla.kmmhttpclient


import io.ktor.client.*

import io.ktor.client.call.*

import io.ktor.client.request.*

import io.ktor.client.statement.*


class GorillaHTTPClient {

    private val httpClient = HttpClient()


    @Throws(Exception::class)

    suspend fun getClientInfo(): String {

        var retVal = "FAILURE"

        val response: HttpResponse = httpClient.get("https://www.code-gorilla.com/gorillaClientInfo")

        if (response.status.value in 200..299) {

            retVal = response.bodyAsText()

        }

        return retVal

    }

}
Here are some notable comments about the code:
- The function is a suspend function to support the asynchronous HTTP request
- @Throws(Exception::class)
Adding Unit Test
We are going to add a new GorillaHTTPClientTest class which will contain a test for our new getClientInfo function.
Right click on commonTest/kotlin/com.code_gorilla.kmmhttpclient and select New Kotlin Class/File. Add a new Class named GorillaHTTPClientTest.
Enter the following code into your new GorillaHTTPClientTest.kt file:
package com.code_gorilla.kmmhttpclient


import kotlinx.coroutines.launch

import kotlinx.coroutines.runBlocking


import kotlin.test.Test

import kotlin.test.assertNotEquals


class GorillaHTTPClientTest {

    private val httpClient = GorillaHTTPClient()


    @Test

    fun webDescriptionTest() {

        runBlocking {

            println("Calling API...")

            launch {

                println("API Launch")

                val res: String = httpClient.getClientInfo()

                println("API Response: $res")

                val expectedC = "FAILURE"

                assertNotEquals(res, expectedC)

            }

            println("API Call Submitted")

        }

    }

}
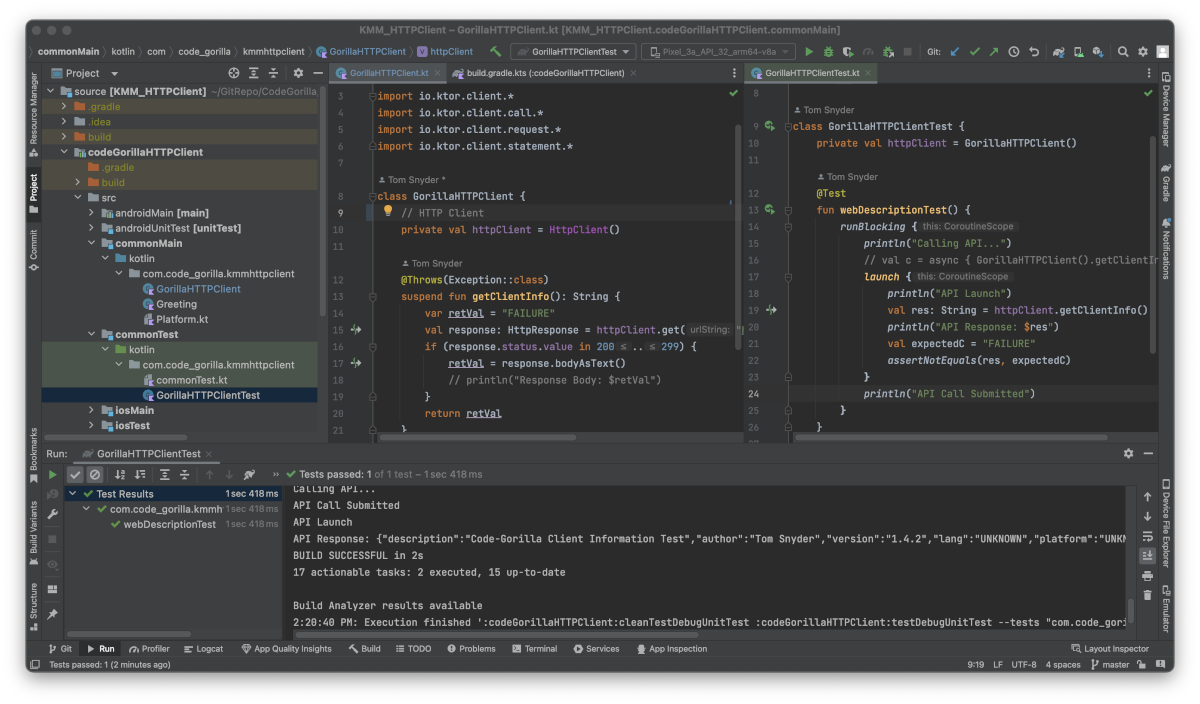
Running the Test
You should be able to run the test by clicking on the "run" button to the left of the class and you should see the test pass.
Note: At the time of writing this article, the test will only run for Android. Running on iOS requires additional configuration that I may outline in a future article, but for the sake of functional testing you can confirm with Android for now and put an additional unit test in your target Xcode project to ensure it works on iOS.
Build the Library for Android and iOS
At this point, we have written some basic Kotlin functions within a self-contained library and tested that it works. We are now ready to build the library for use within other projects. In this case we will be building the library for both Android and iOS.
Clean Up
Let's start by cleaning our build folders to ensure we are starting with a clean slate by running the gradle clean. Open your terminal/command prompt, navigate to the root folder of your project and execute the following command:
gradle clean
Android
In your terminal/command prompt window, execute the following gradle command:
gradle build
If you get a warning, similar to the following during the build 'compileReleaseUnitTestJavaWithJavac' task (current target is 1.8) and 'compileReleaseUnitTestKotlinAndroid' task (current target is 19) jvm target compatibility should be set to the same Java version., you can fix it by adding the following compileOptions to the android section your build.gradle.kts file:
android {

    namespace = "com.code_gorilla.kmmhttpclient"

    compileSdk = 33

    defaultConfig {

        minSdk = 27

        targetSdk = 33

    }

    compileOptions {

        sourceCompatibility = JavaVersion.VERSION_19

        targetCompatibility = JavaVersion.VERSION_19

    }

}
After you update the build.gradle.kts file, perform and gradle sync and run the build again. The warning should now go away.
When you run the build, you will be creating the Android Archive (AAR) files in the following location: /source/codeGorillaHTTPClient/build/outputs/aar. The AAR files can now be used as a dependency within other Android applications.
iOS
When you ran the gradle build command above, you created the Android files and you also created the iOS framework files:
- /source/codeGorillaHTTPClient/build/bin/iosSimulatorArm64
- /source/codeGorillaHTTPClient/build/bin/iosArm64
- /source/codeGorillaHTTPClient/build/bin/iosX64
Our objective in this article is to create XCFramework files, not framework files. So we have one additional step to accomplish this goal.
In your terminal/command prompt window, execute the following gradle command:
gradle assembleXCFramework
Upon successful completion, you should now see your XCFramework files in the following location: /source/codeGorillaHTTPClient/build/XCFrameworks
SUCCESS! We now have our library prepared for both Android and iOS!