In this article, we will be using ASP.NET Core to build a Windows Service that you can control within the Services of Windows using Visual Studio 2019.
In Visual Studio 2019, create a new project as "Worker Service"

Enter your project name and framework.
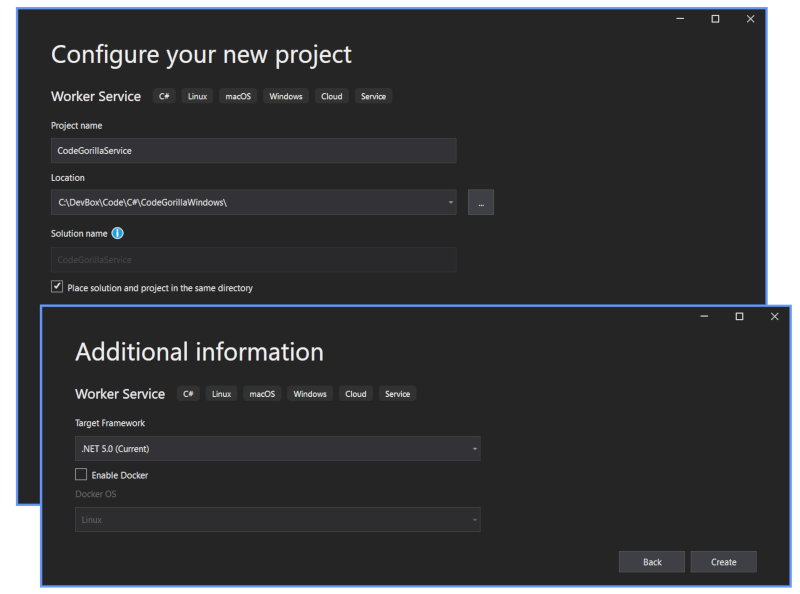
Visual Studio will create your solution with a template for a WebApplication. My objective for this discussion is to to create a WINDOWS service.
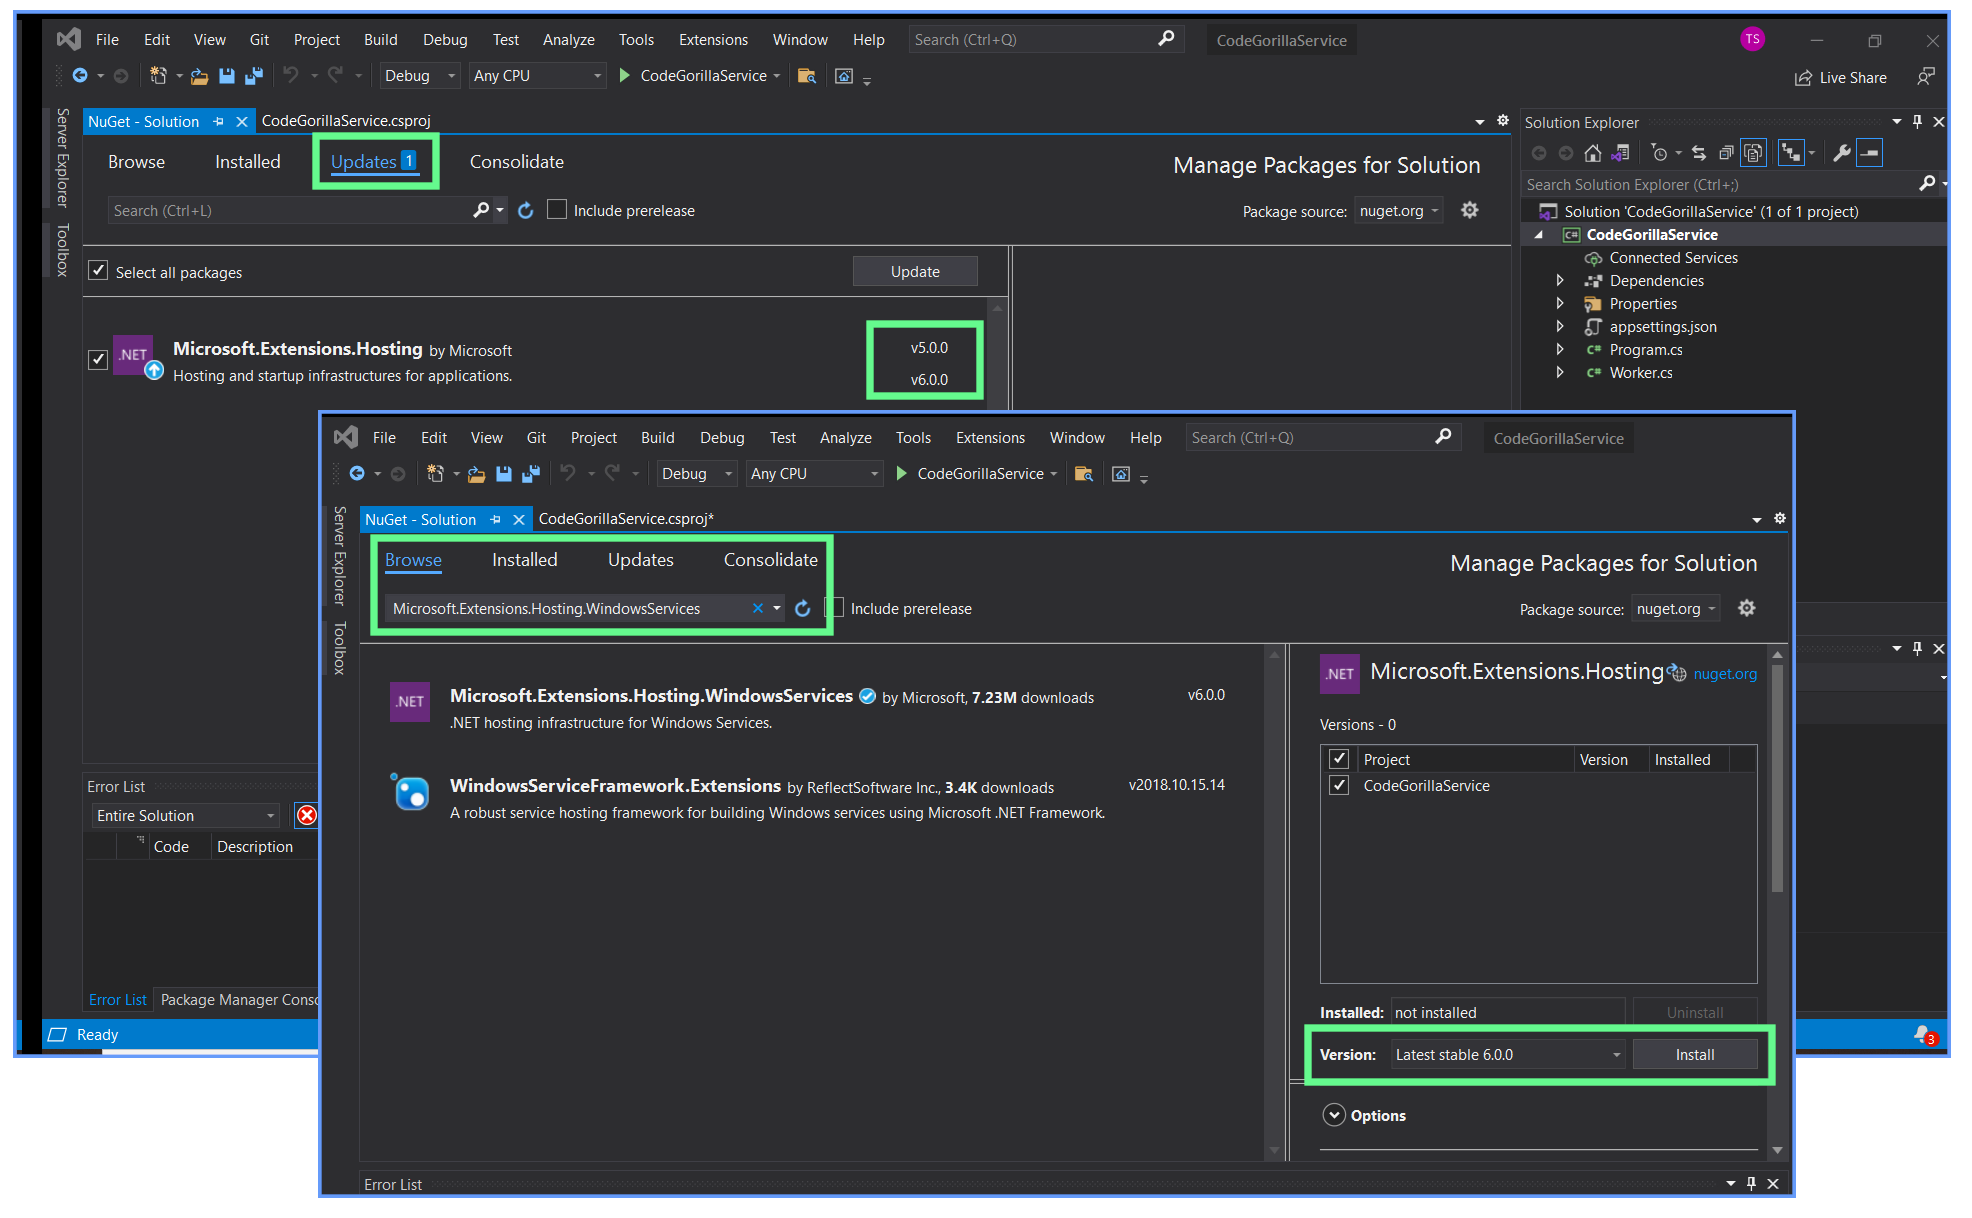
Manage NuGet Packages for Solution...
Update the Hosting that was automatically added at the creation of the project, then add Microsoft.Extensions.Hosting.WindowsServices.
At this point you can confirm the package dependencies were successfully installed by reviewing the *.csproj file, which should now reference the nuget packages as follows:
<ItemGroup>
<PackageReference Include="Microsoft.Extensions.Hosting" Version="6.0.0"/>
<PackageReference Include="Microsoft.Extensions.Hosting.WindowsServices" Version="6.0.0"/>
</ItemGroup>
Code
Worker.cs
The Worker class will handle the loop to look for a cancellation (CNTL+C) to exit. Within the loop it will log some text then sleep for a second. This will be repeated until cancelled.
public class Worker : BackgroundService
    {
        private readonly ILogger _logger;
        public Worker(ILogger logger)
        {
            _logger = logger;
        }

        protected override async Task ExecuteAsync(CancellationToken stoppingToken)
        {
            while (!stoppingToken.IsCancellationRequested)
            {
                _logger.LogInformation("Worker running at: {time}", DateTimeOffset.Now);
                await Task.Delay(1000, stoppingToken);
            }
        }
    }
Program.cs
The Program class defaults to a Web Application, to support a web application we will slightly modify it as follows:
public class Program
    {
        public static void Main(string[] args)
        {
            CreateHostBuilder(args).Build().Run();
        }

        public static IHostBuilder CreateHostBuilder(string[] args) =>
            Host.CreateDefaultBuilder(args)
                .UseWindowsService(options =>
                {
                    options.ServiceName = "CodeGorilla Service";
                })
                .ConfigureServices((hostContext, services) =>
                {

                    services.AddHostedService();
                });
    }
The .UseWindowsService will enable it to run as a windows service. The options.ServiceName will be the name displayed in Services, which you will see soon.
Note: If you don't implement the .UseWindowsService, you will be able to run from the command line but you will not be able to run as a Windows Service.
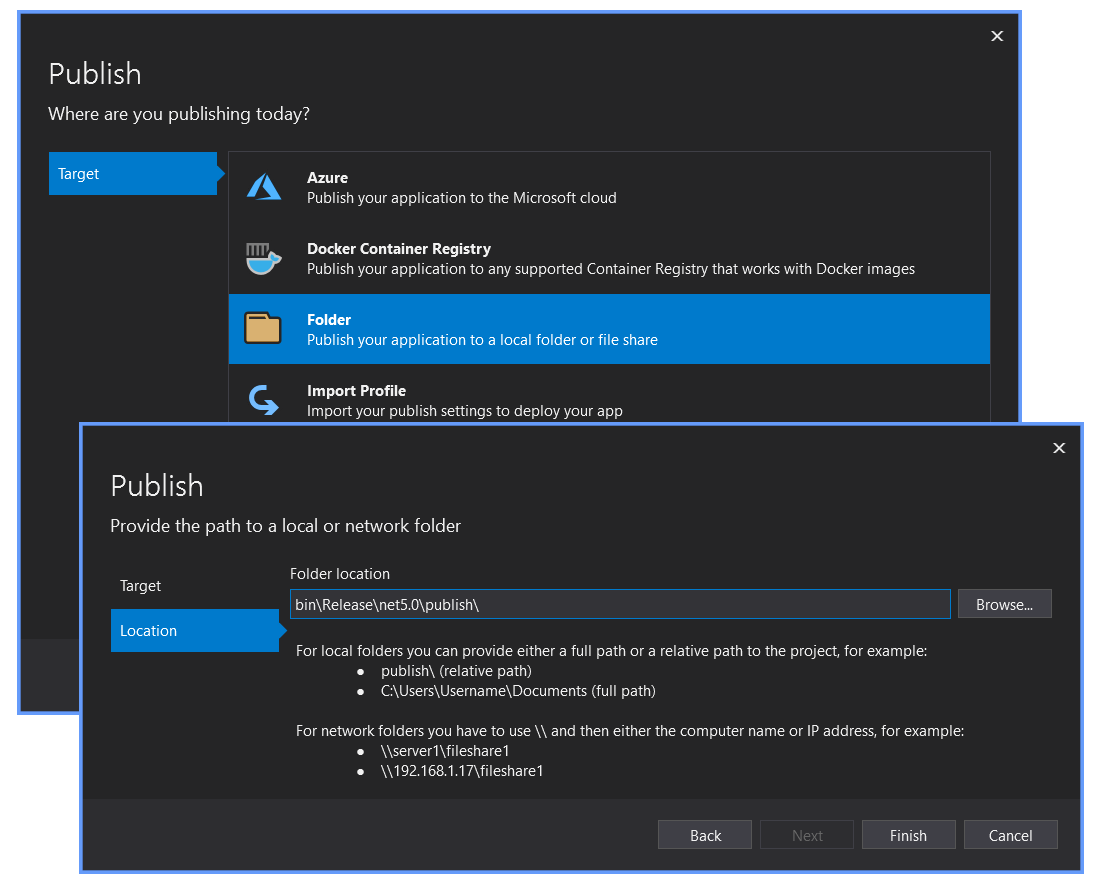
Publish the App
in VS, Build | publish | Target = Folder
Select your release folder location, default = bin\Release\net5.0\publish\ | Click on Finish
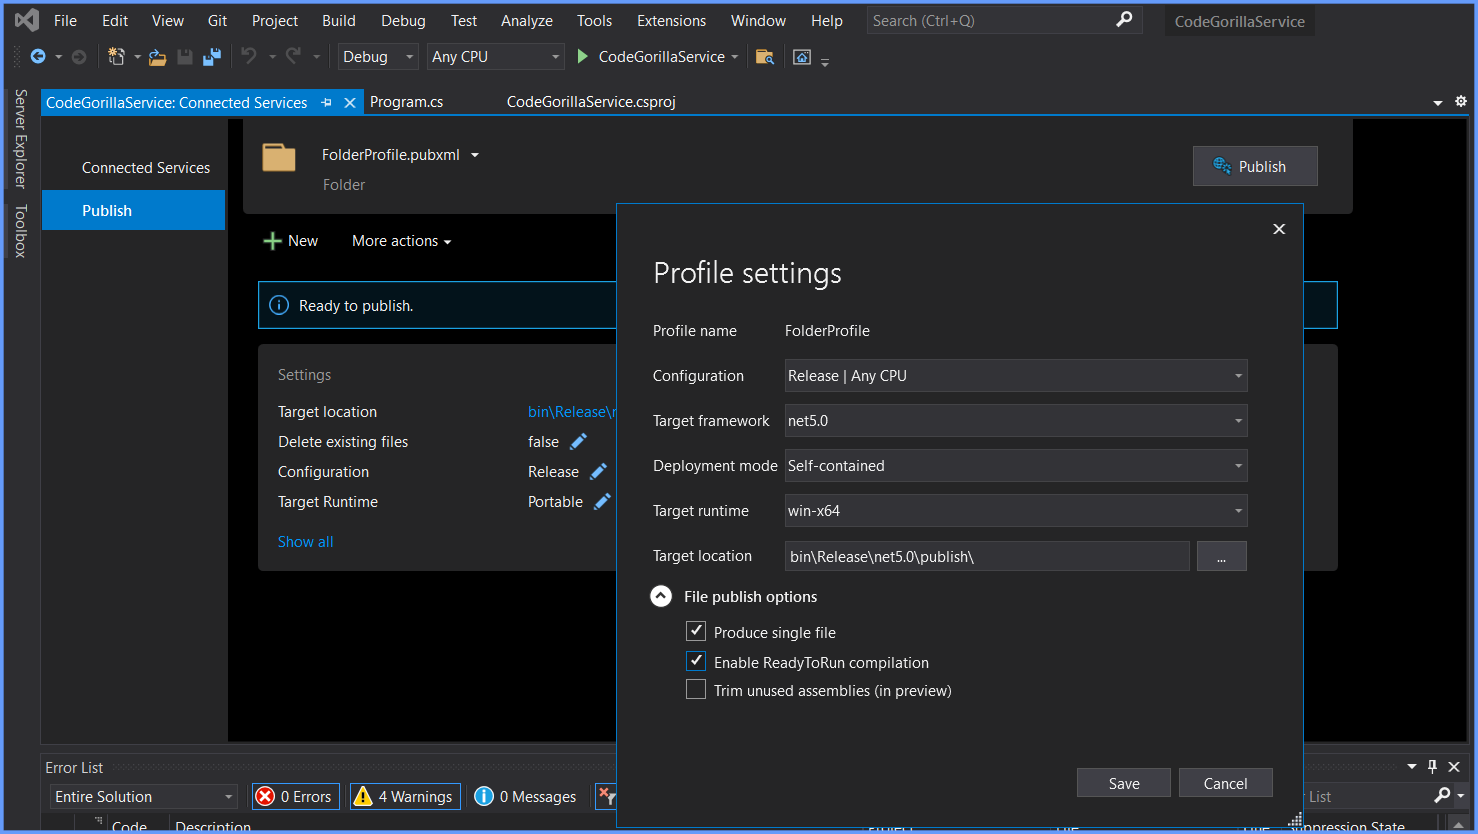
Click on Show All
- Deploy mode = Self Contained
- File Publish Options
-
- Produce Single File - Check
- Enable ReadyToRun compilation - Check
Optionally, before you click on Publish, you can also add the following values to Properties\PublishProfiles\FolderProfile.pubxml:
Exe
embedded
I don't know if the OutputType changes anything, but the DebugType will embed your *.pdb file into the resulting *.exe to make it cleaner.
Click on Publish and you will find your exe
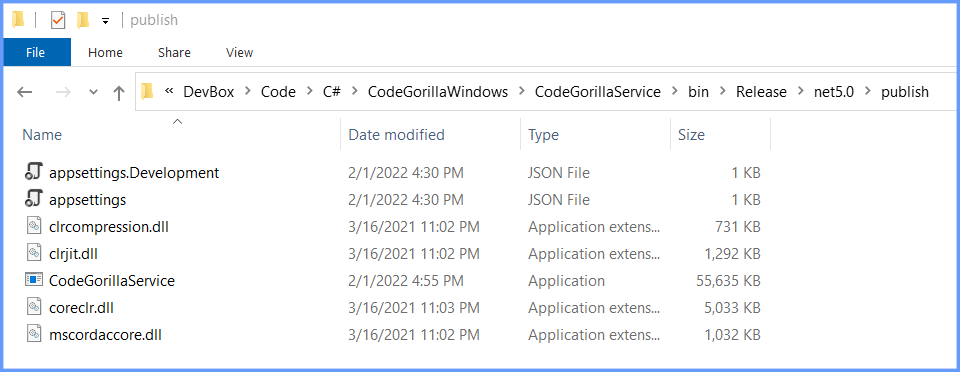
Just so I'm not pointing to my build folder I am going to copy my published files into a pseudo deployment location:
From: C:\DevBox\Code\C#\CodeGorillaWindows\CodeGorillaService\bin\Release\net5.0\publish
To: C:\DevBox\Code-Gorilla\services\DemoService
Create the service
Run PowerShell as Adminstrator
sc.exe create "Code-Gorilla Test Service" binpath="C:\DevBox\Code-Gorilla\services\DemoService\CodeGorillaService.exe"
You should get confirmation
	[SC] CreateService SUCCESS


PS C:\WINDOWS\system32> sc.exe start "Code-Gorilla Test Service"


SERVICE_NAME: Code-Gorilla Test Service

        TYPE               : 10  WIN32_OWN_PROCESS

        STATE              : 2  START_PENDING

                                (NOT_STOPPABLE, NOT_PAUSABLE, IGNORES_SHUTDOWN)

        WIN32_EXIT_CODE    : 0  (0x0)

        SERVICE_EXIT_CODE  : 0  (0x0)

        CHECKPOINT         : 0x0

        WAIT_HINT          : 0x7d0

        PID                : 15772

        FLAGS              :
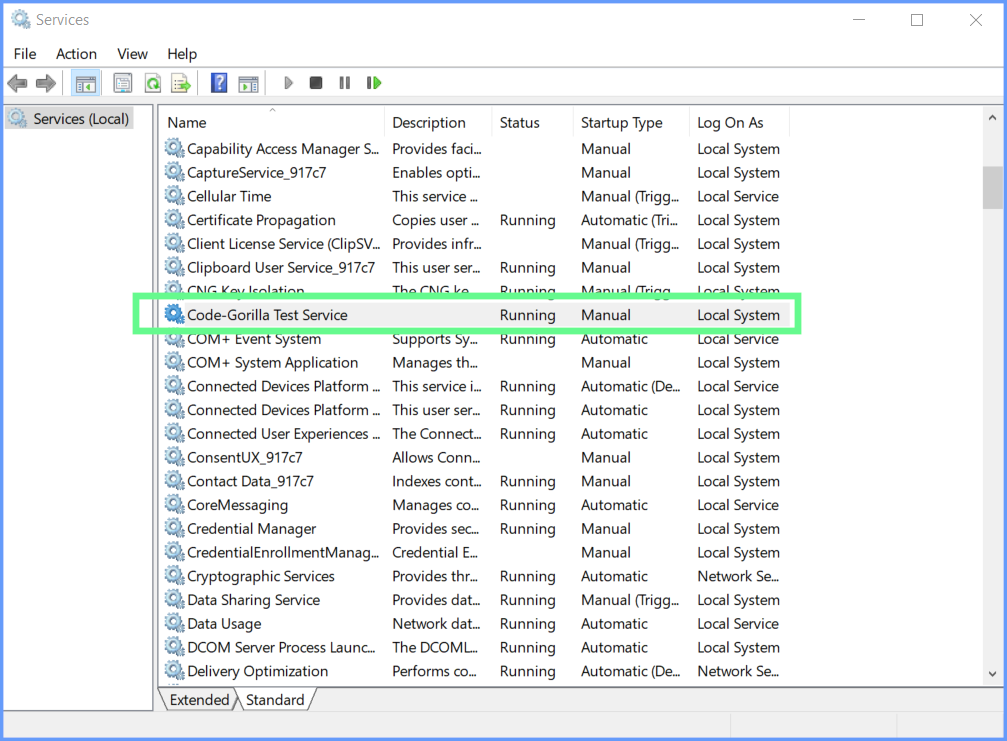
Verification
Windows | Search | Services
Windows | Search | Event Viewer
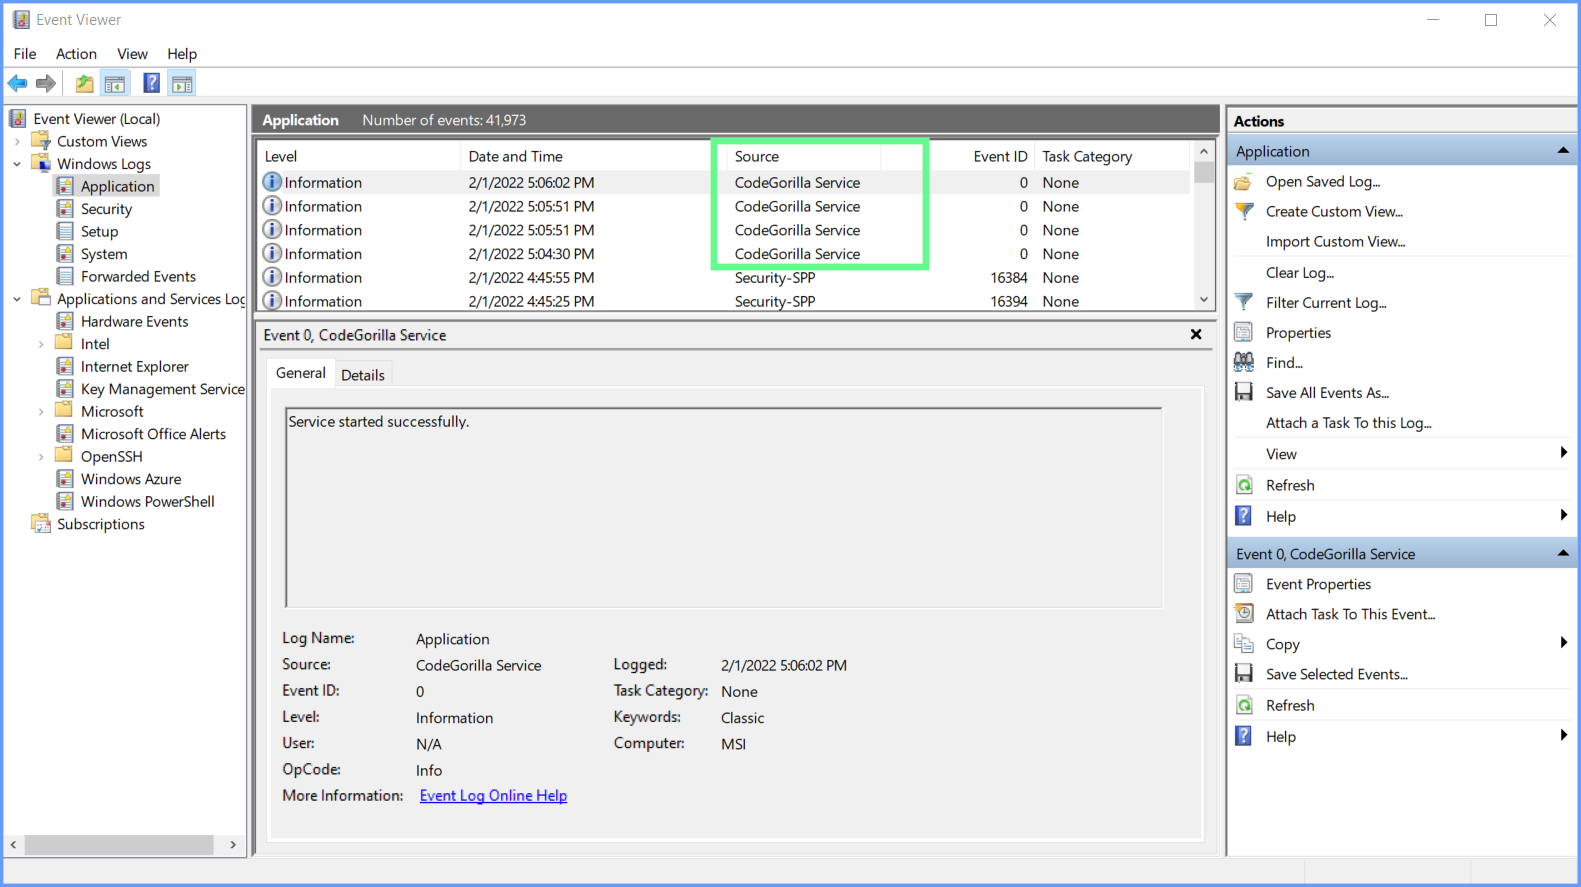
Notice they have 2 different names.
- When we created the service in PowerShell it assigned the name to the service.
- When you view the events, it uses the name that was assigned in the C# code.
I would recommend keeping those values the same, but I wanted to illustrate what each one does.