Instructions to create a new Kotlin project in Eclipse to use Gradle
In this article, we will build a new empty Kotlin application in Eclipse that uses Gradle.
Eclipse Kotlin Plug in
Ensure you have the Kotlin Plug In for Eclipse:
- Eclipse | Help | Eclipse Marketplace
Get the version that was built by JetBrains.
Gradle
Ensure you have Gradle installed. You can see how to install
here.
Initialize the Gradle Project
You need to initialize the gradle project in a location that you intend to commit to git (or some other repository).
Create a new directory and run
gradle init

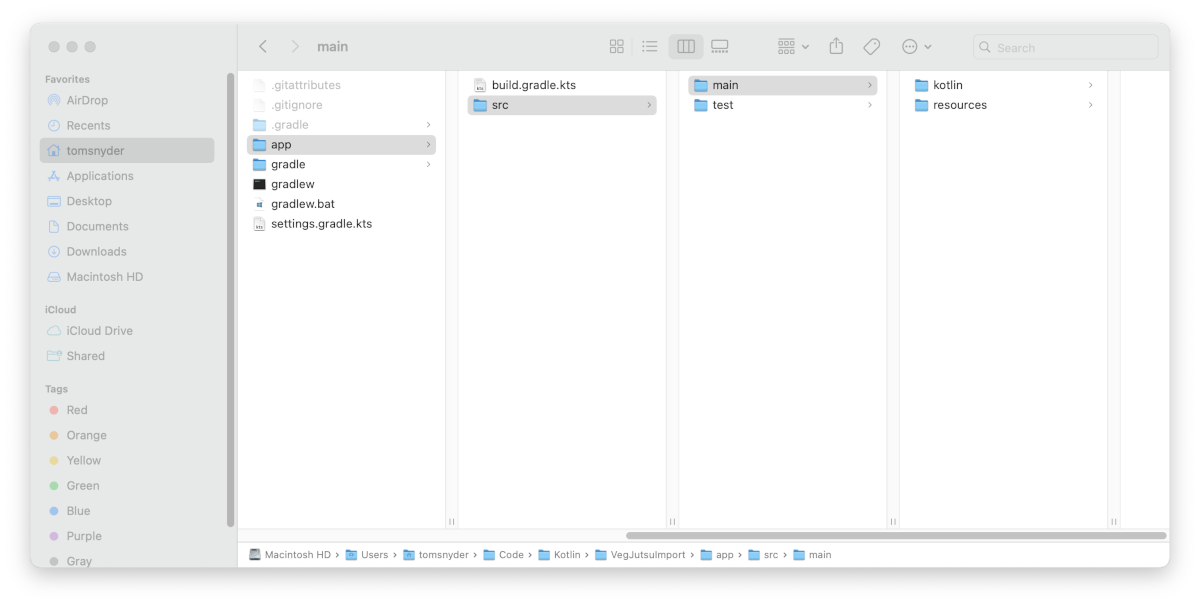
You should have the following structure created:
Create new Eclipse Project
- Create a new empty directory as your new workspace.
- Import the gradle project that was created into your workspace.
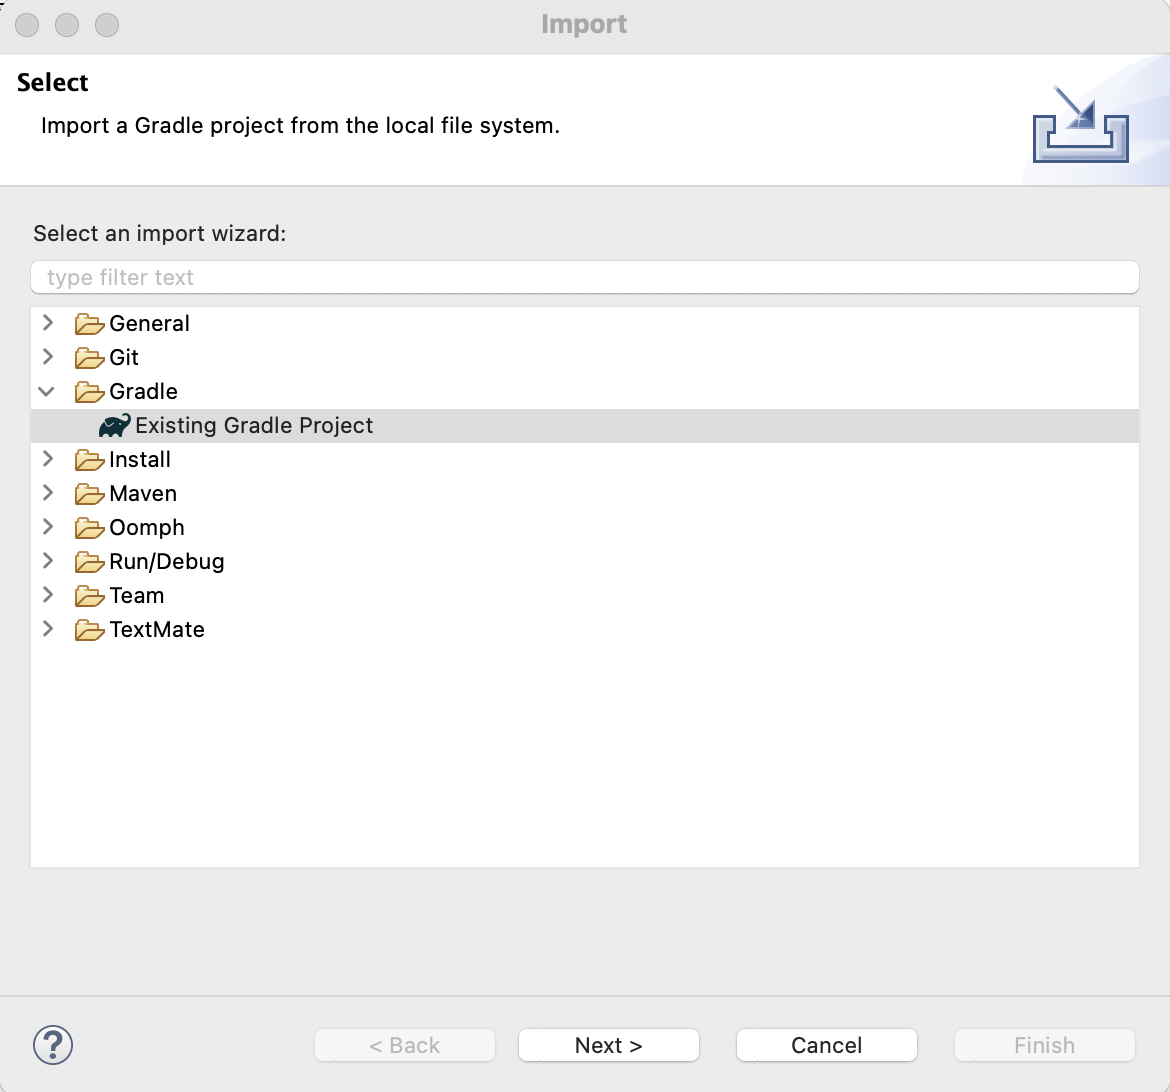
- File | Import | Gradle | Existing Gradle Project
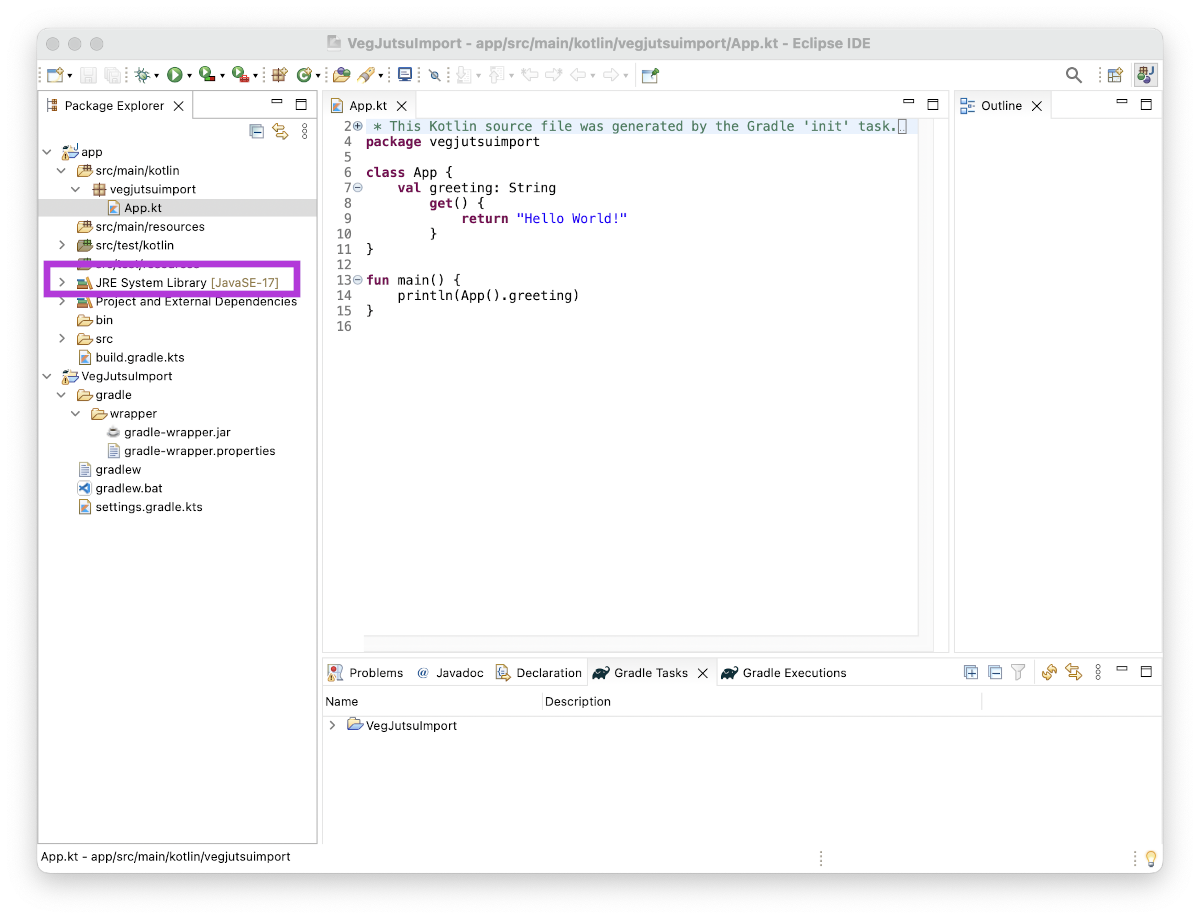
This is what your new Eclipse project should look like after you have imported the Gradle project:
JDK for Kotlin
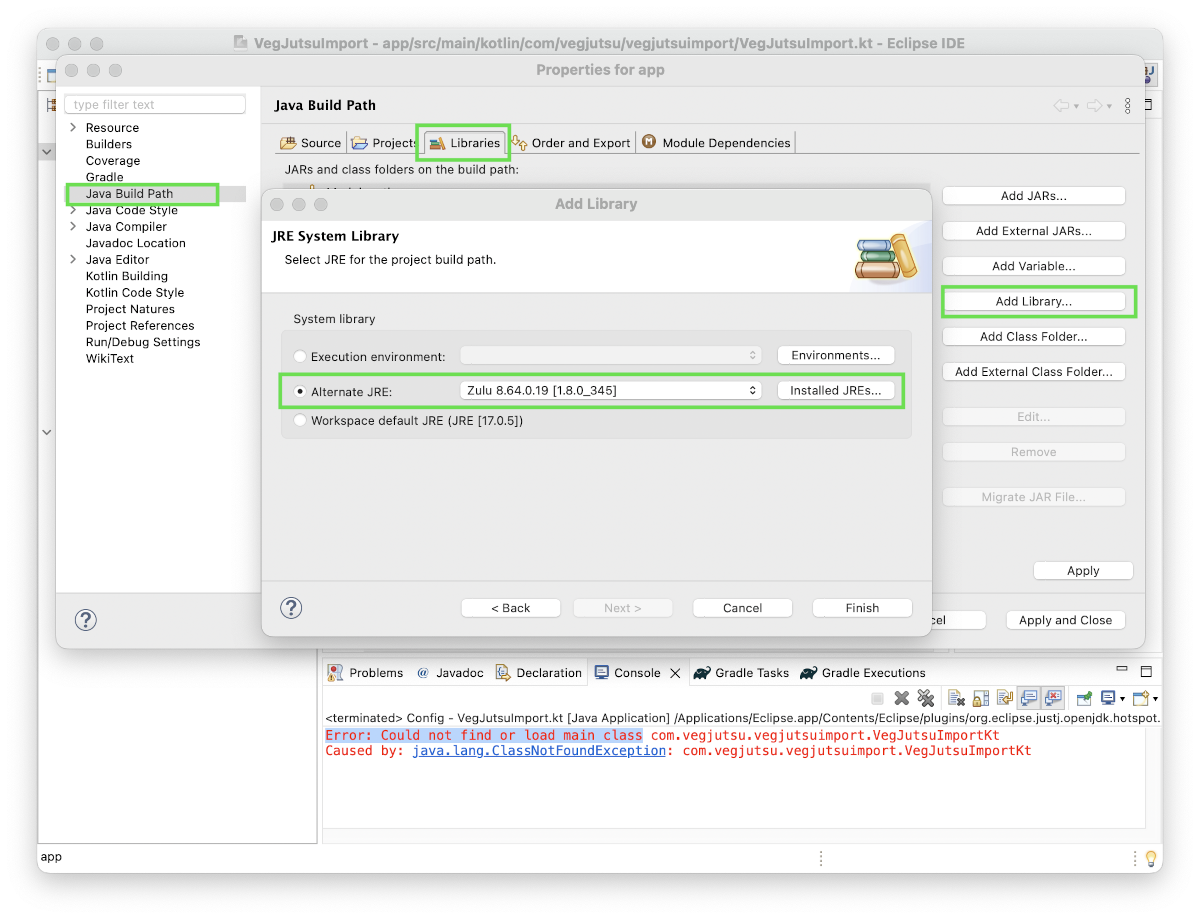
At the time of writing this article, Java 8 was the maximum version supporting Kotlin. If you have a newer version installed on your machine, as I do, you will most likely encounter this error when attempting to run you Kotlin Application
Error: Could not find or load main class.
To fix this problem, make sure you have Java 8 installed and you set it as your JDK.
- Right click on your project in the project explorer and click on Properties
- Select Java Build Path and the Libraries tab.
- Add Library | JRE System Library
- Alternate JRE | Java 8 option you have installed
- Remove the newer JRE
Confirmation
Once you ensure you have a compatible JDK in your Library List you can now run the application to confirm it's working.
Right Click on the source window and select Run As | Kotlin Application. You should see Hello World in your console window.

You're all set to start building your Kotlin application!