Using the Zebra Link-OS SDK Objective-C XCFramework in Xcode with SwiftUI
This article shows you how to build a sample application that utilizes the Zebra Link-OS SDK Objective-C XCFramework within a SwiftUI application. We will manually install the XCFramework and confirm that it is running using a simple application written in SwiftUI.
Prerequisites
Xcode
Before we begin you will need to have Xcode installed (I am using version 15.3 at the time of writing this article).
Zebra Link-OS SDK
You will need to download the SDK:
https://www.zebra.com/us/en/support-downloads/software/printer-software/link-os-multiplatform-sdk.htm
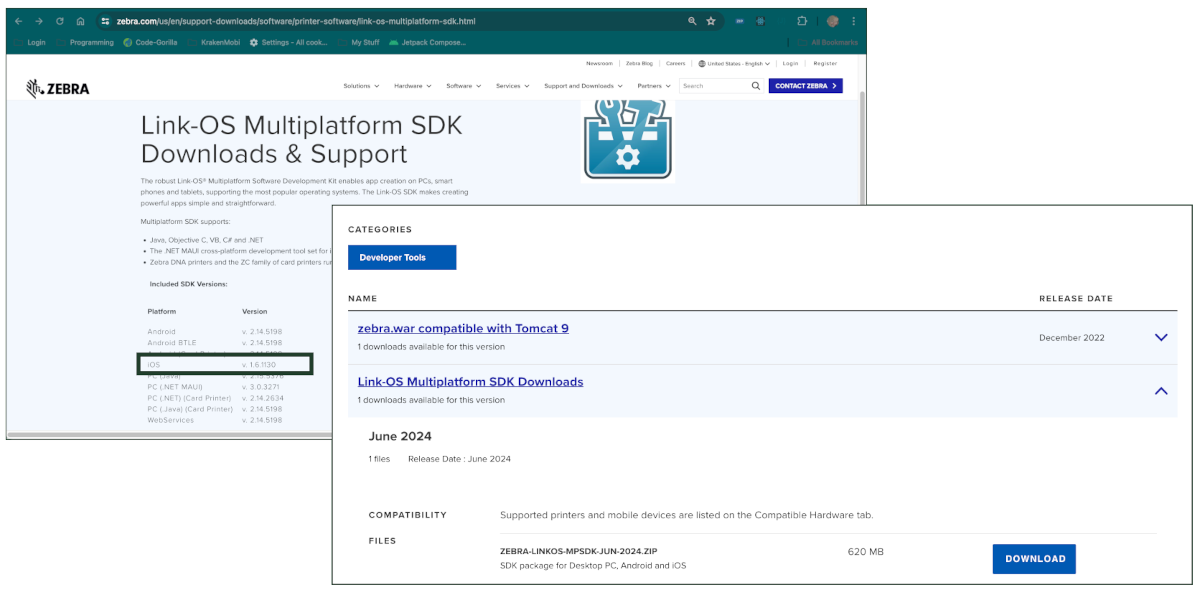
When you unzip the download you will find the SDK in the following location where you will find 2 folders to provide options for the install:
zebra-linkos-mpsdk-jun-2024/iOS/v1.6.1130/lib
- FATLib
- xcframework (We will be using the xcframework folder.)
Create new iOS application within Xcode
In Xcode:
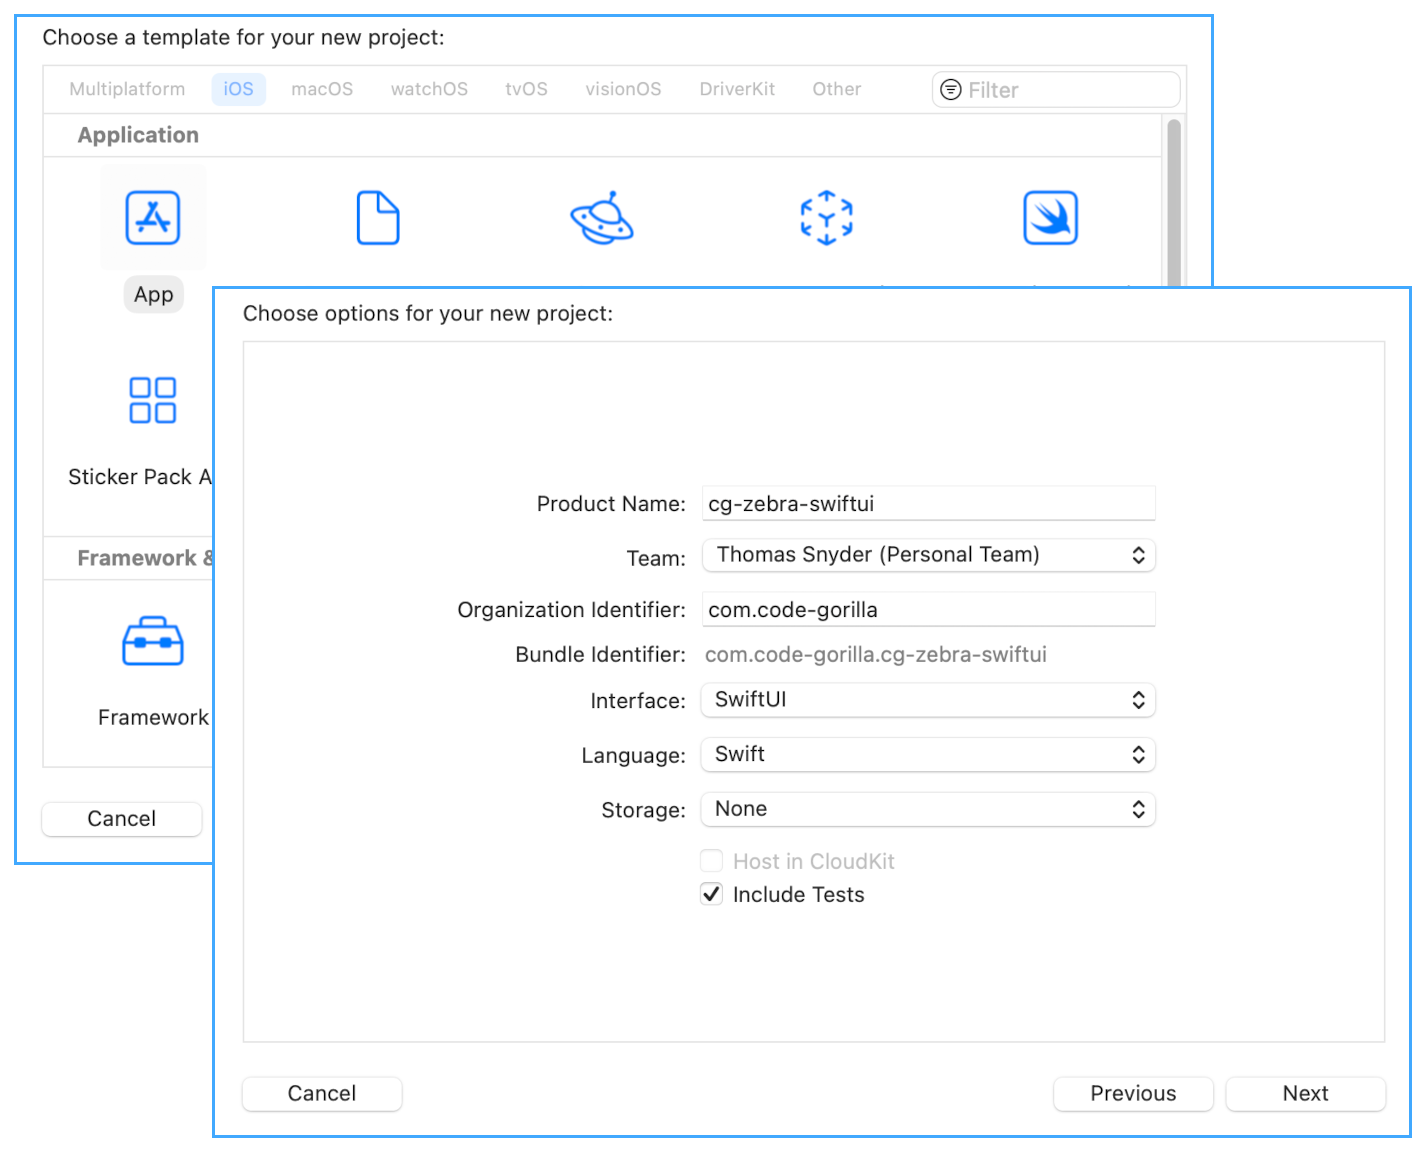
- File | New | Project...
- Choose the App template in the iOS Applications section.
- Name your product, select your team and make sure your Organization Identifier is unique to your team.
- Select SwiftUI for your Interface and Swift for your Language.
- Click Next and select your preferred directory location.
Once your initial project is created I would recommend building it to ensure you don't have any issues from the start.
Adding the XCFramework
In Xcode, in the project navigator, right click on the project and select
New Group. Name your group
Frameworks. This will be where we will place the framework and headers.
- In Xcode, in the project navigator, select the newly created Frameworks group to prepare for the copy into it.
- In Finder, navigate to the folder that you extracted the SDK (zebra-linkos-mpsdk-jun-2024/iOS/v1.6.1130/lib/xcframework).
- Copy the
ZSDK_API.xcframework folder from Finder into the new Frameworks folder within Xcode.
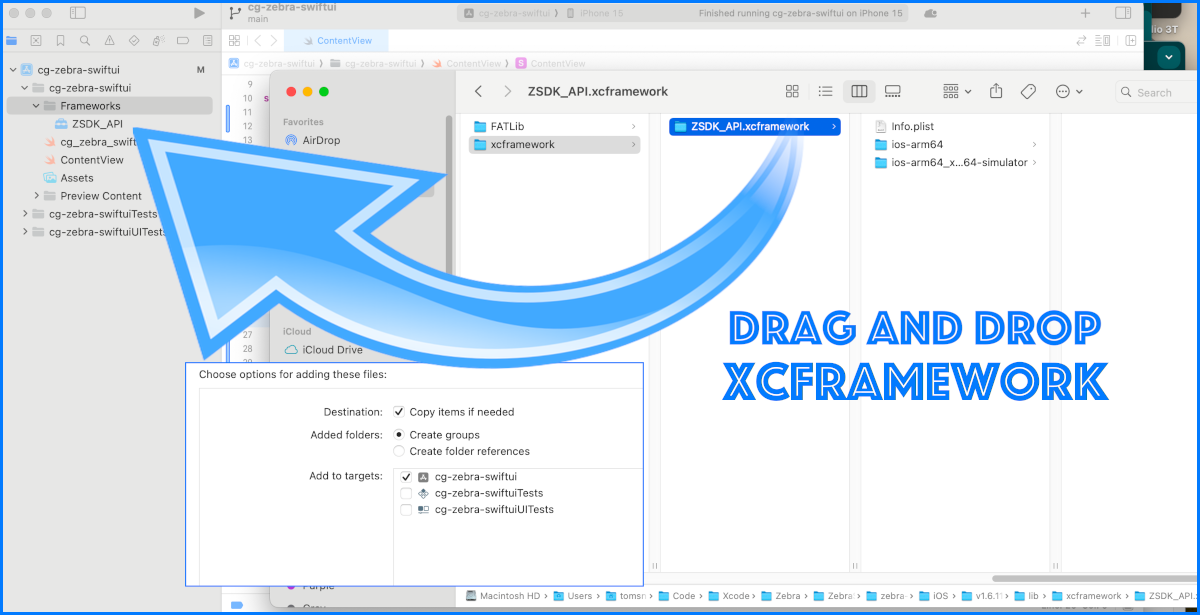
During the copy, you will be prompted to answer a few questions:
- Destination: Copy items if needed
- Added Folders: Create groups
- Add to targets: ZSDKDeveloperDemos
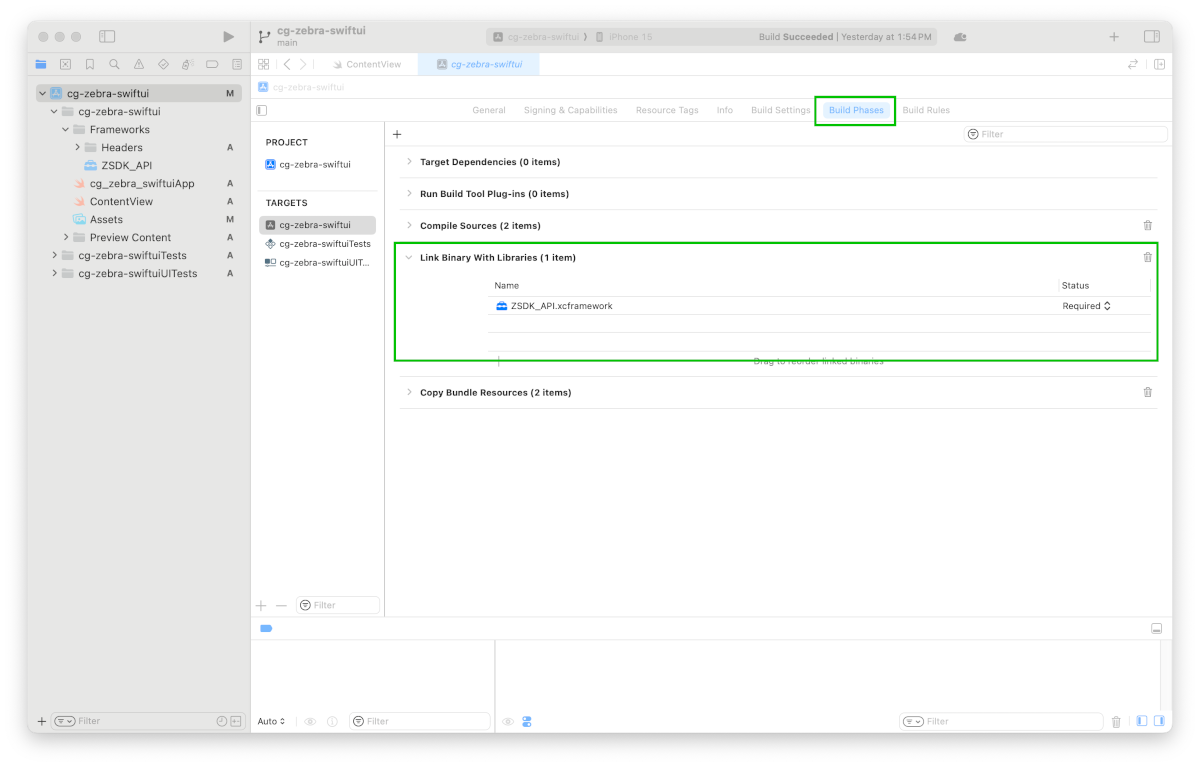
Once you copy the XCFramework you will see it listed in the
Link Binary with Libraries in the
Build Phases.
Adding the Headers
I had some difficultly with this initially. I believed that when you added the XCFramework (which includes the headers) that the headers would be automatically visible to the project. But this is not immediately true. I also had to copy the Headers folder into the project as follows:
- In Xcode, in the project navigator, select the Frameworks group to prepare for the copy into it.
- In Finder, navigate to the folder that you extracted the SDK (zebra-linkos-mpsdk-jun-2024/iOS/v1.6.1130/lib/xcframework).
- Copy the
ZSDK_API.xcframework/ios-arm64/Headers folder from Finder into the new Frameworks folder within Xcode.
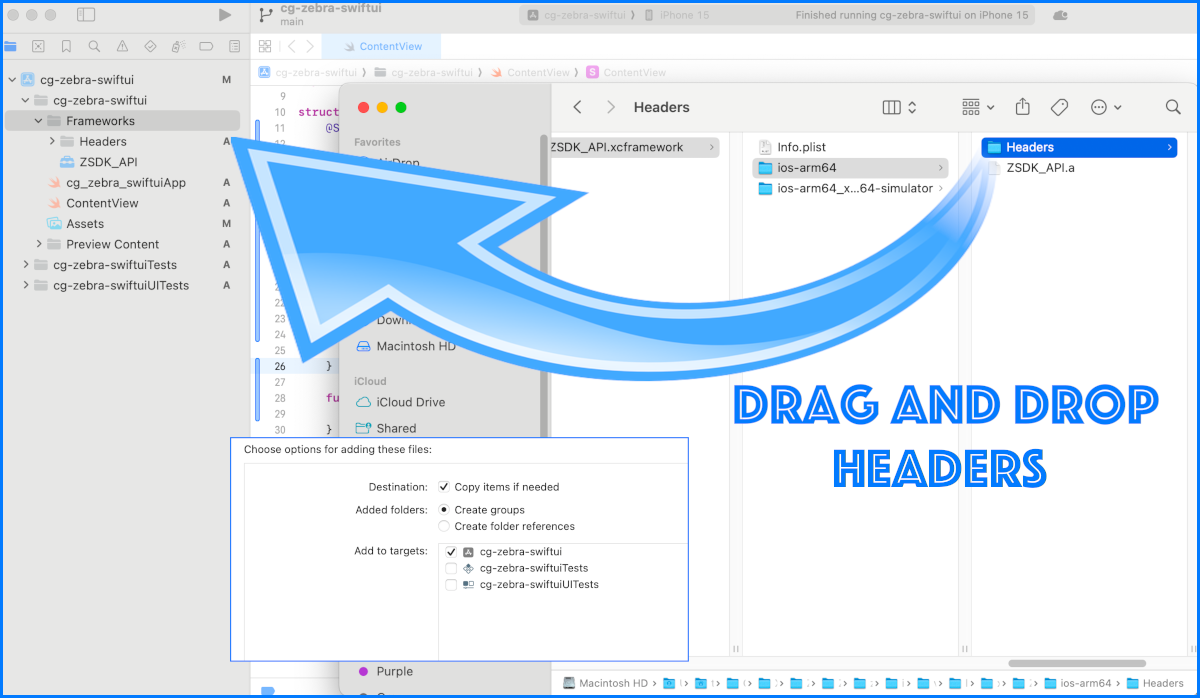
During the copy, you will be prompted to answer a few questions:
- Destination: Copy items if needed
- Added Folders: Create groups
- Add to targets: ZSDKDeveloperDemos
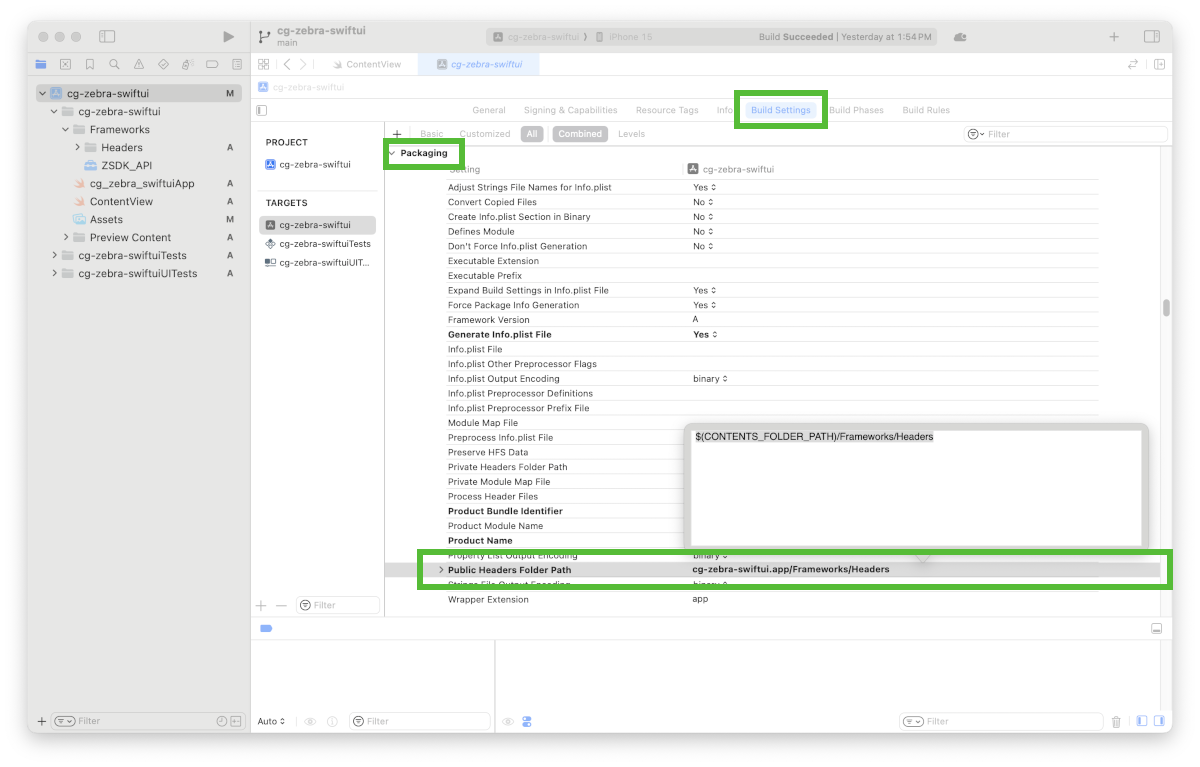
Once you copy the Headers you will need to add the path in the
Build Settings in the
Packaging | Public Headers Folder Path. The default expects the Headers to be in the root directory, and you're free to do that. I prefer to keep it all together in the Frameworks folder.
Bridging Header
Previously we added the headers to the project allowing the project to see the headers for an Objective-C project. To make the Objective-C items visible to Swift we need to create a bridging header. We will be creating a bridging header named CodeGorilla-Zebra-Bridging-Header.h in the root of the project.
File | New | File | Header File | CodeGorilla-Zebra-Bridging-Header
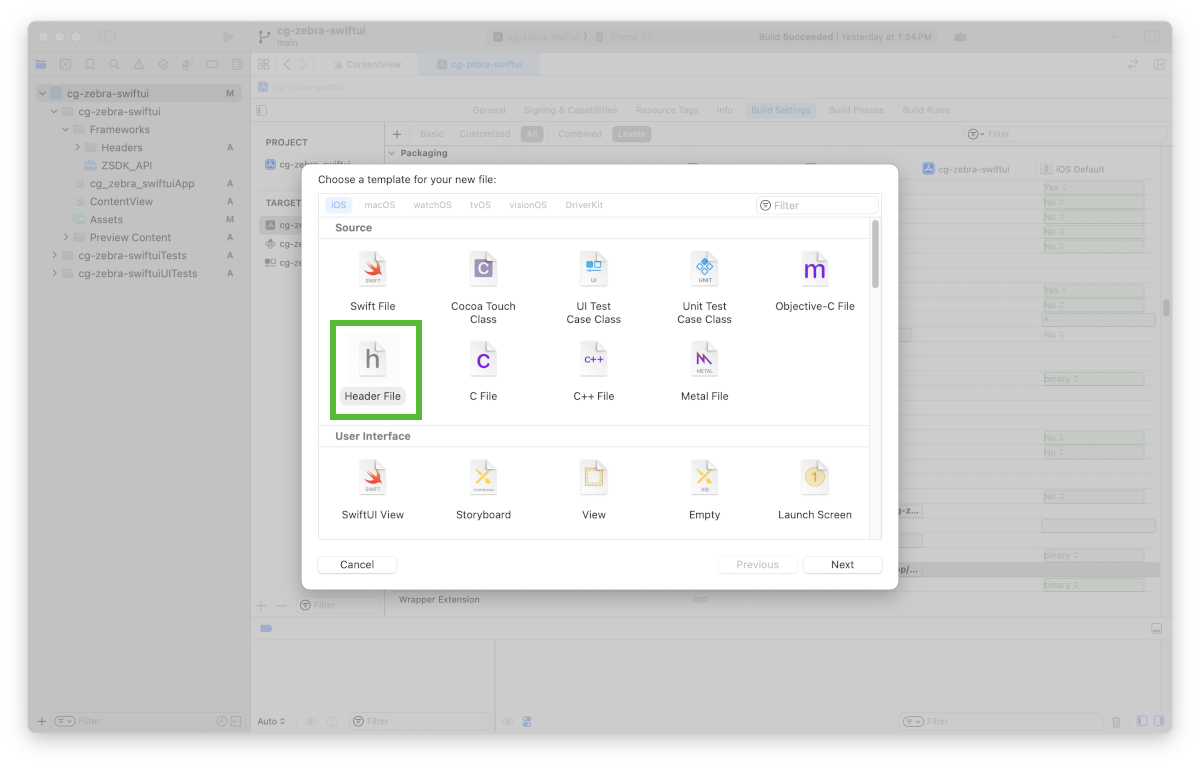 When you save your bridging header, make sure that all of the targets are selected.
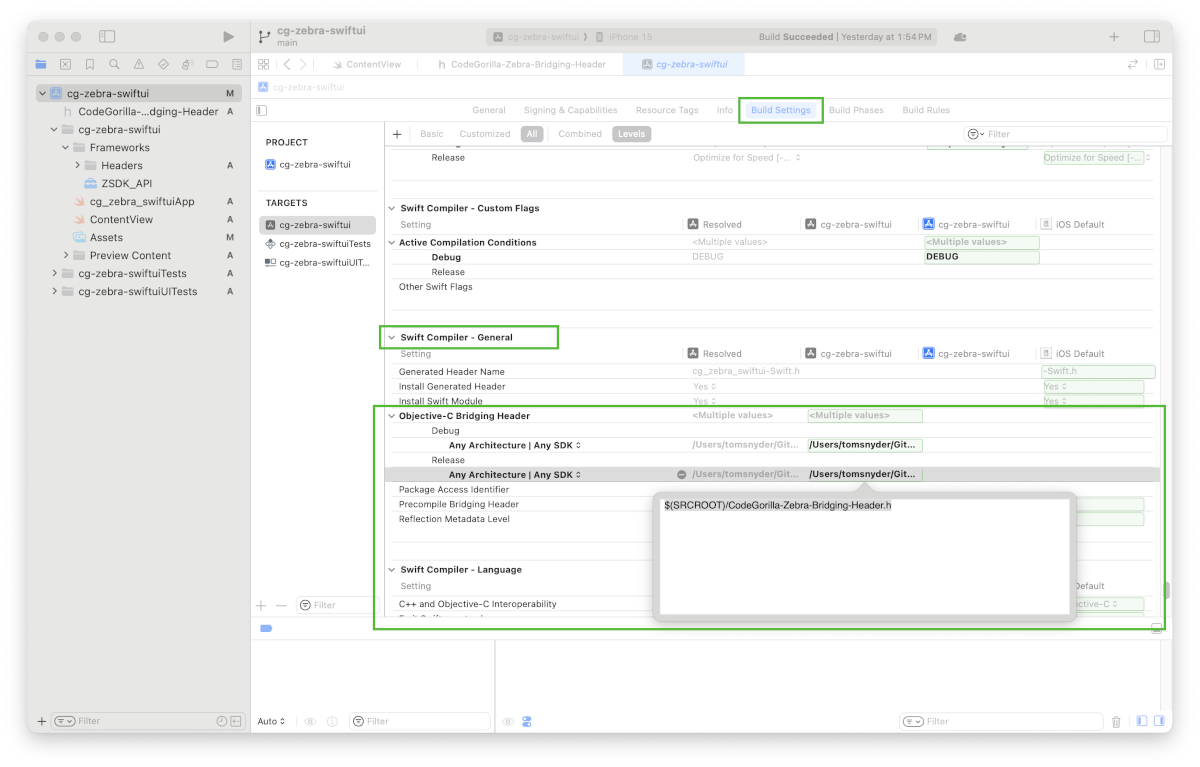
Next, you will need to tell the Swift compiler where the bridging header is by adding them to the
Build Settings in the
Swift Compiler - General | Objective-C Bridging Header.
You will want to add the following value
$(SRCROOT)/CodeGorilla-Zebra-Bridging-Header.h to Debug AND Release for any architecture.
Now we can populate the bridging header to import the Foundation header and all of the headers that we copied into the project. Your resulting bridging header should look as follows:
#ifndef CodeGorilla_Zebra_Bridging_Header_h

#define CodeGorilla_Zebra_Bridging_Header_h


#import <Foundation/Foundation.h>


#import "DiscoveredPrinter.h"

#import "DiscoveredPrinterNetwork.h"

#import "FieldDescriptionData.h"

#import "FileUtil.h"

#import "FormatUtil.h"

#import "GraphicsUtil.h"

#import "MagCardReader.h"

#import "MfiBtPrinterConnection.h"

#import "NetworkDiscoverer.h"

#import "PrinterStatus.h"

#import "PrinterStatusMessages.h"

#import "ResponseValidator.h"

#import "SGD.h"

#import "SmartCardReader.h"

#import "TcpPrinterConnection.h"

#import "ToolsUtil.h"

#import "ZebraErrorCode.h"

#import "ZebraPrinter.h"

#import "ZebraPrinterConnection.h"

#import "ZebraPrinterFactory.h"

#import "ZplPrintMode.h"


#endif /* CodeGorilla_Zebra_Bridging_Header_h */
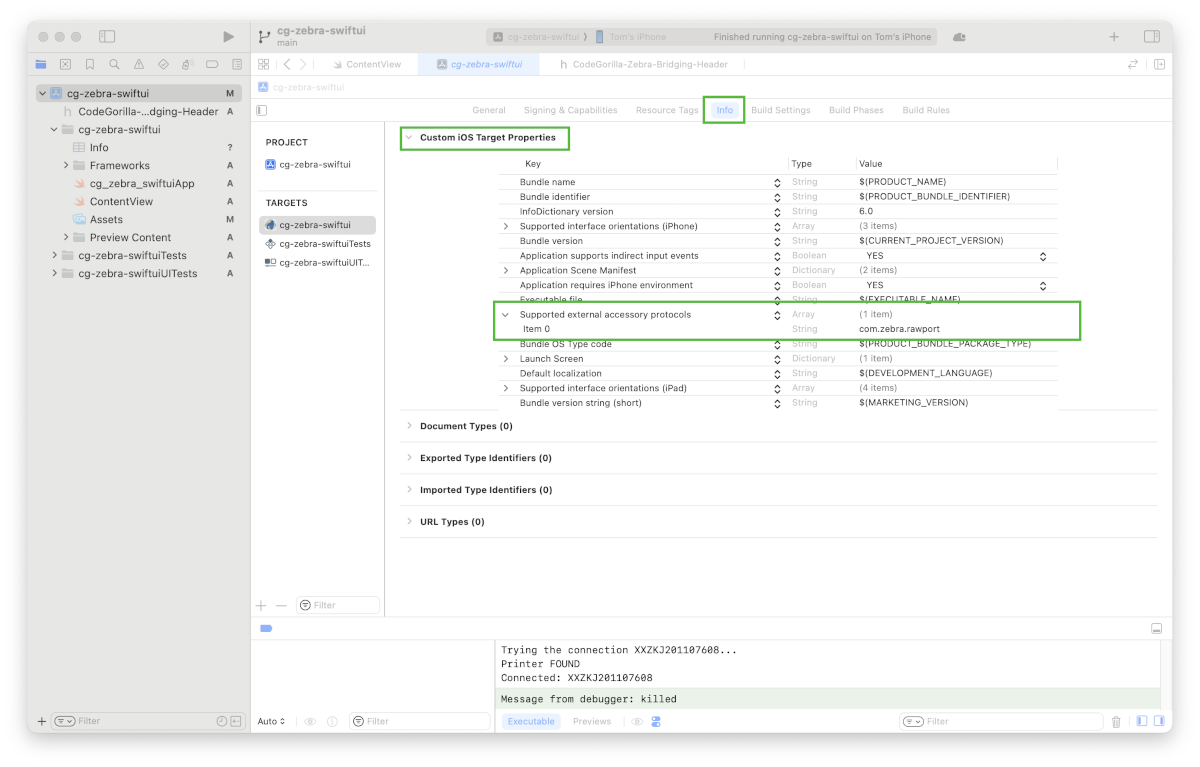
Allowing External Protocol for Zebra
If you attempt to use the library without specifying the external protocol support, you will not receive any errors, although it will never successfully connect. So, let's add it.
Info | Custom iOS Target Properties | Supported external accessory protocols
item 0 =
com.zebra.rawport
Writing the Code
Now that everything is setup, we can now use it in the code. I am going to simply update the existing ContentView.swift file that is automatically created by the application template when you created the project. This will be a very simplified application that will simply confirm that it can identify and connect from your iPhone to the Zebra printer using bluetooth.
import SwiftUI


struct ContentView: View {

    @State private var name:String = "XXZXX707080808"

    @State private var status:String = "Awaiting Test"


    var body: some View {


        VStack {

            Form {

                TextField("Device Name", text: $name)

                Spacer()

                TextField("Status", text: $status)

                Spacer()

                Button(action: testConnection) {

                    Label("Test Connection", systemImage: "wifi")

                }

            }


            Spacer()

        }

    }


    func testConnection() {

        var bluetoothPrinters : Array<Any> = []

        print("Trying the connection \(name)...")


        let manager : EAAccessoryManager = EAAccessoryManager.shared()

        bluetoothPrinters = manager.connectedAccessories


        if (bluetoothPrinters.count > 0) {

            let _ = print("Bluetooth printer(s) found")


            var zebraConn: ZebraPrinterConnection!

            zebraConn = MfiBtPrinterConnection(serialNumber: name)


            let didOpen: Bool = zebraConn.open();

            DispatchQueue.main.async {

                if (didOpen == true) {

                    let _ = print("Connected: \(name)")

                    status = "Connection verified: \(name)"

                } else {

                    let _ = print("Unable to connect with printer: \(name)")

                    status = "Connection FAILED: \(name)"

                }

            }

            zebraConn.close()

        } else {

            let _ = print("NO Bluetooth Printers Found")

            status = "NO Bluetooth printer found"

        }

    }

}


#Preview {

    ContentView()

}
Build and Run the application
You should now be able to
build the application successfully. But, you won't be able to connect using a simulated device, so you'll
need to run the application on a physical device. You will also need to
pair your bluetooth printer to your phone before running the application.
Now you will be able to
build and
run the application your physical iPhone device.
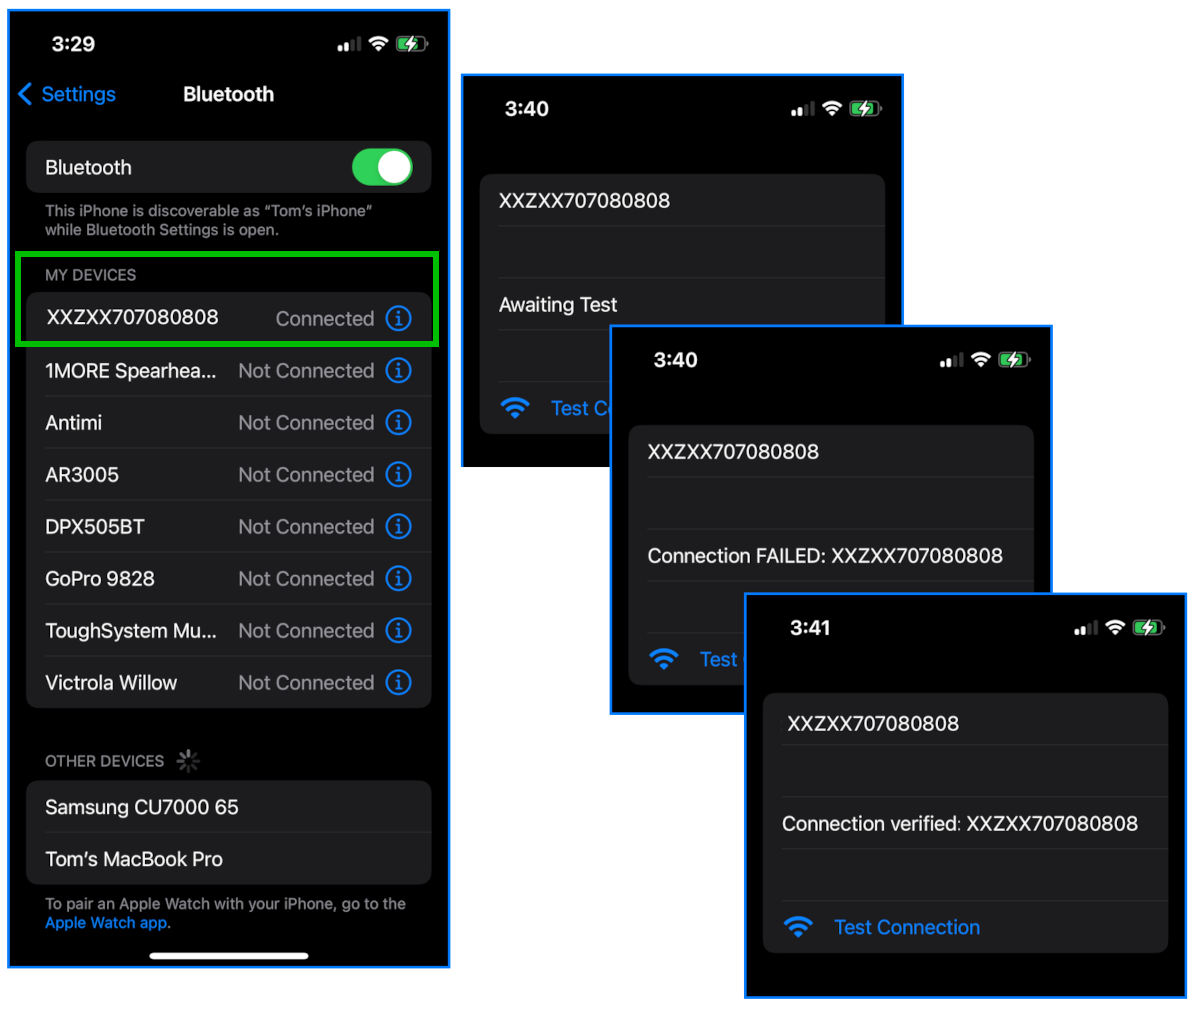
Congratulations! It's running! Now that you have a working base project and you can now explore all the features the SDK has to provide.
This article supports SwiftUI, if you're interested in doing the same thing in Objective-C checkout out my previous article:
https://www.code-gorilla.com/view-article/installing-the-zebra-link-os-sdk-on-ios
Download the Code
I have made the code that we reviewed in git for your enjoyment:
git clone https://CodeGorilla@bitbucket.org/CodeGorilla/cg-zebra-swiftui.git
References